The primary aim of Colour Management and Monitor Calibration is to view and manipulate files on your computer monitor and reproduce those exact same tones in the finished print. Calibrating a monitor adjusts the colour, gamma and luminance to an industry standard.
It is not the intention of these notes to teach all of the intricacies of Colour Management, Theory or Monitor calibration, but to enable any photographer to achieve impressive results from their digital images with the minimum fuss and bother.
A number of steps may be taken to improve image quality as outlined below:
Visual Calibration
Step 1. Situate your computer monitor in a room with neutral coloured walls. Reduce the amount of natural daylight, as this will affect the quality of the monitor calibration. This does not mean a pitch black room. Use lighting, which is as close to natural daylight as possible. For example, fluorescent tubes with a rating of 95 or above.
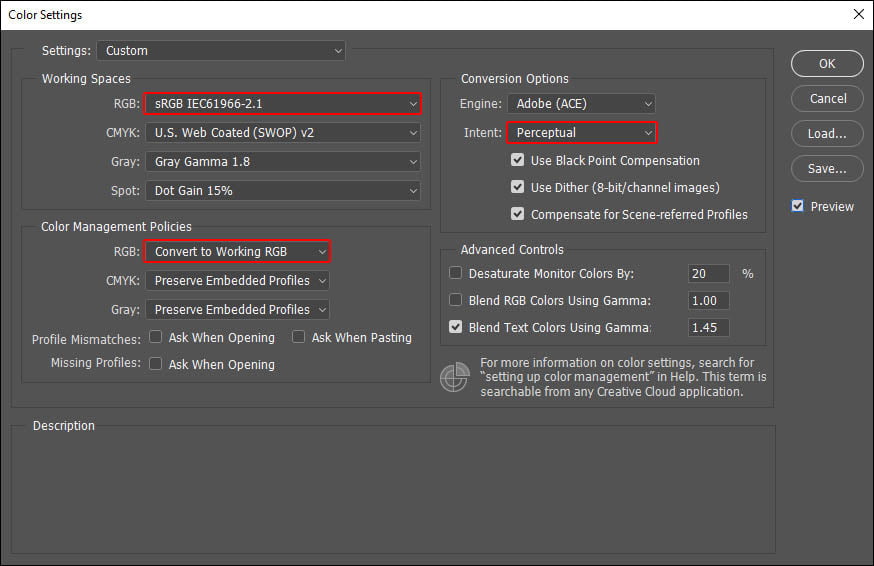
Step 2. If you use Adobe Photoshop, go to the Menu and select Colour Settings and make sure all settings appear as per image below. You need only change the 3 highlighted settings. Other settings like CMYK do not apply and can be left at default. Please note: You may use sRGB or Adobe1998 when printing inkjet style prints such as fine art papers or canvas however sRGB is by far preferred when printing onto photographic paper like lustre or gloss. Although Adobe1998 is a larger colour space (thus editing in this space is more than fine) all photographic paper does have its limitations when it comes to reproducible colour. All photographic wet process printers in the world use the sRGB IEC1966-2.1 profile.
Most will accept Adobe 1998 but some have a fit converting them for printing and you may get undesirable results.
Inkjet Fine Art printing is generally fine with either sRGB IEC1966-2.1 or Adobe Photoshop as they are usually printed via RIPs or directly from Photoshop.
Save these settings and give the settings a Title like “BWLab” setttings.
Now close Photoshop and reopen to verify these settings. These setting will work perfectly for 99.99% of most professional photographer highest requirements.
(If Photoshop crashes then you may need to reset the colour settings)
Step 3. Next download the two calibration images as shown below by clicking on either of them and dragging them to your desktop or by right clicking and selecting “Save Picture As…” (on a Mac this is “Save image As…”).
Google chrome tends to save files as .webP rather than .JPG so if the file is saving as a .webP file you will need to use a different browser to save the files. Safari on mac or Internet Explorer/Edge on a PC should work. Alternatively send us an email and and we can email you the file directly.
Next, notify us that you require the “Calibration images” and we will post them to you at no charge, alternatively you may collect them from our shop during normal business hours. With the digital files opened up in Adobe Photoshop, view the prints we have sent you alongside your computer monitor. Adjust the monitor controls at the bottom of the screen till the images on screen appear the same in contrast , density and colour as the prints. An alternative to this is to use Adobe Gamma or on PC go to start/settings/control panel/display/settings/advanced/view/device settings/color corrections. (The exact path may vary depending on your video card).
These adjustments will yield very acceptable results in many cases. If a higher degree of accuracy is required then see the “Advanced monitor calibration”.

Step 4. After manipulating images in Photoshop it will be necessary to save those images for printing. For images with layers etc, the easiest method is to go to File / Save As and use the settings displayed below.
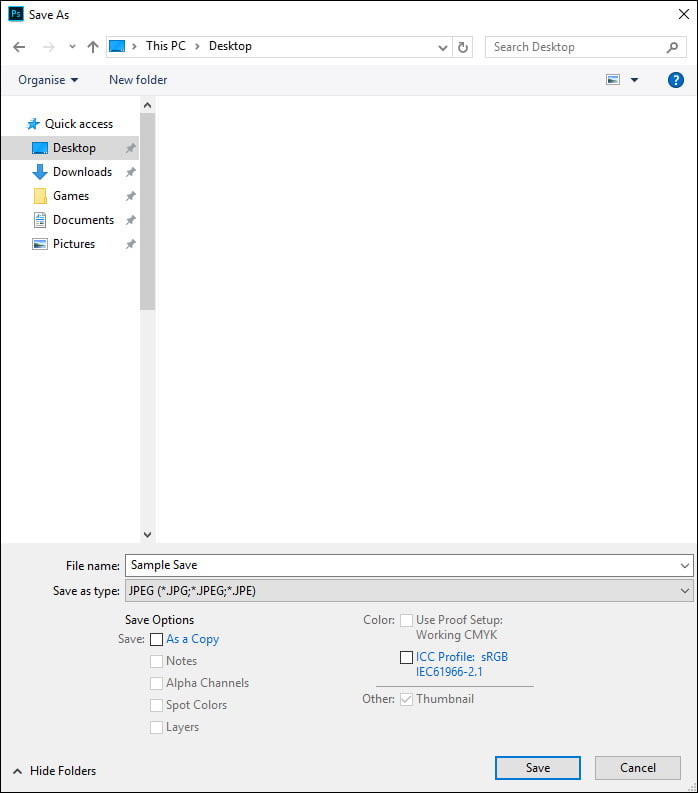
For prints up to 12 x 18 inches, keep the file name to 8 characters without the use of symbols like “$#@!%^&*()-+. Spaces are acceptable. Only the first 8 characters are printed on the back.
Let us know if you require special back printing options.
For prints above this size, you may use any number of characters. Please remember to tick the Embed Color profile Box.
Click “Save”
The next screen that appears is that shown below.
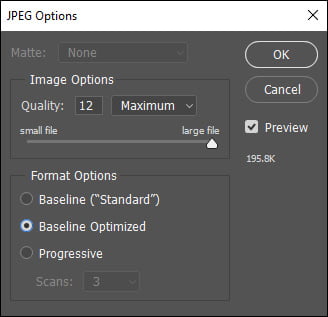
Quality set at maximum is recommended for minimum loss or image degradation, but may be set much lower if results are acceptable. The only true method of determining this factor is by sending test images for printing. Use Baseline Optimized for best results. Baseline “Standard” is primarily used for display on the Internet.
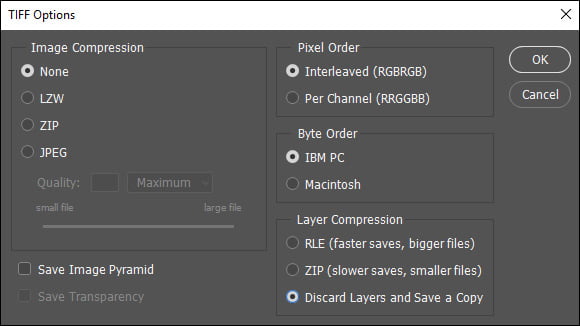
If image quality is an issue, especially for large images with fine detail or text, then “Save As” “Tiff” format as shown below is the best option.
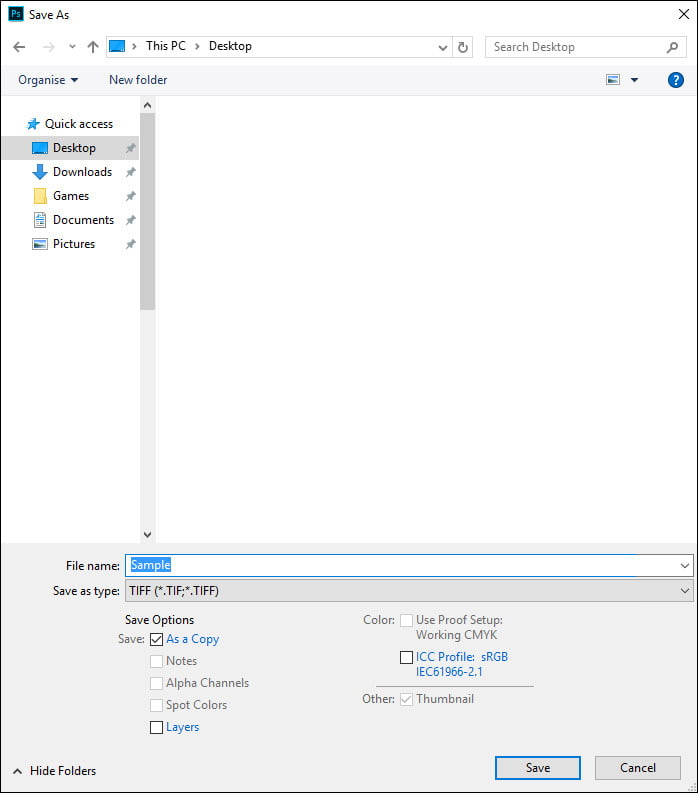
Click “Save” then apply the following, then click “OK”
For a complete list of specifications on digital images, please refer to our complete Price List. For a more in-depth analysis and explanation of these settings refer to the documentation provided with your copy of Adobe Photoshop or contact Matt.